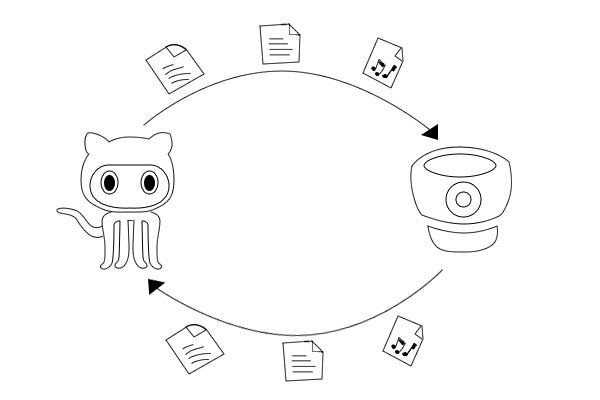
I just migrated a private repository from github to bitbucket. In this process, moving the entire codebase is not enough especially when you have hundreds of issues and lots of wikis – you need to keep track of them in the new repo. So with a few google searches, I did it in a few moments, although the information was pretty scattered – hence this tutorial!
What's the one thing every developer wants? More screens! Enhance your coding experience with an external monitor to increase screen real estate.
Export Issues
Github and Bitbucket both have REST APIs that you can use to list, get, create, edit, delete issues but its always good when there’s an existing library/module/package available to do the task for you. Some guy was kind enough to write such a ruby library to export issues from github found here. Using it is super easy:
# Clone the repo
$ git clone https://github.com/sorich87/github-to-bitbucket-issues-migration.git issue_migrator
Cloning into 'issue_migrator'...
remote: Counting objects: 40, done.
remote: Compressing objects: 100% (35/35), done.
remote: Total 40 (delta 4), reused 40 (delta 4)
Unpacking objects: 100% (40/40), done.

# cd into it
$ cd issue_migrator/

# Install dependencies listed in Gemfile
$ bundle install
Fetching gem metadata from https://rubygems.org/.........
Fetching gem metadata from https://rubygems.org/..
Installing addressable (2.3.3)
Installing backports (3.1.1)
Installing multipart-post (1.2.0)
Installing faraday (0.8.7)
Installing faraday_middleware (0.9.0)
Installing hashie (2.0.3)
Installing json_pure (1.7.7)
Installing multi_json (1.7.2)
Installing netrc (0.7.7)
Installing octokit (1.24.0)
Installing rubyzip (0.9.9)
Using bundler (1.3.5)
Your bundle is complete!
Use `bundle show [gemname]` to see where a bundled gem is installed.

# Create the export now!
$ bundle exec ruby cli.rb [github_user]/[github_repo] [github_username] [github_password] export_filename.zip

# \o/
We clone the ruby package from github, install its dependencies with bundle and execute the cli.rb to export our issues.
The bundle command comes from a ruby gem called Bundler that is used to manage dependencies of ruby apps, listed in a file called Gemfile. The ruby app in this case is the repo we just cloned from github. This approach is analogous to npm install in the node.js world where it reads package.json and installs all the dependancies of the app. Installing bundler is super easy:
# Install Bundler gem
$ gem install bundler
Fetching: bundler-1.3.5.gem (100%)
Successfully installed bundler-1.3.5
Parsing documentation for bundler-1.3.5
Installing ri documentation for bundler-1.3.5
Done installing documentation for bundler (2 sec).
1 gem installed
SSL Connect Error
In my case, the exporting command was leading to SSL Connect error from the net/http gem (in the stdlib). It looked something like this:
# Exporting Issues
$ bundle exec ruby cli.rb [github_user]/[github_repo] [github_username] [github_password] export_filename.zip
/usr/local/Cellar/ruby/2.0.0-p0/lib/ruby/2.0.0/net/http.rb:917:in `connect': SSL_connect returned=1 errno=0 state=SSLv3 read server certificate B: certificate verify failed (Faraday::Error::ConnectionFailed)
.. and the entire stack trace ..
With the help of this SO answer I was able to fix this problem:
# Get the Certificate
$ wget http://curl.haxx.se/ca/cacert.pem
--2013-05-27 11:27:29--  http://curl.haxx.se/ca/cacert.pem
Resolving curl.haxx.se... 80.67.6.50, 2a00:1a28:1200:9::2
Connecting to curl.haxx.se|80.67.6.50|:80... connected.
HTTP request sent, awaiting response... 200 OK
Length: 251338 (245K)
Saving to: ‘cacert.pem’

100%[======================================>] 251,338      169KB/s   in 1.4s   s

2013-05-27 11:27:32 (169 KB/s) - ‘cacert.pem’ saved [251338/251338]

# Export now, notice how the env var is set
$ SSL_CERT_FILE=cacert.pem bundle exec ruby cli.rb [github_username]/[github_repo] [github_username] [github_password] export_filename.zip
Notice how I set the SSL_CERT_FILE environment variable in the exporting command.
Import Issues
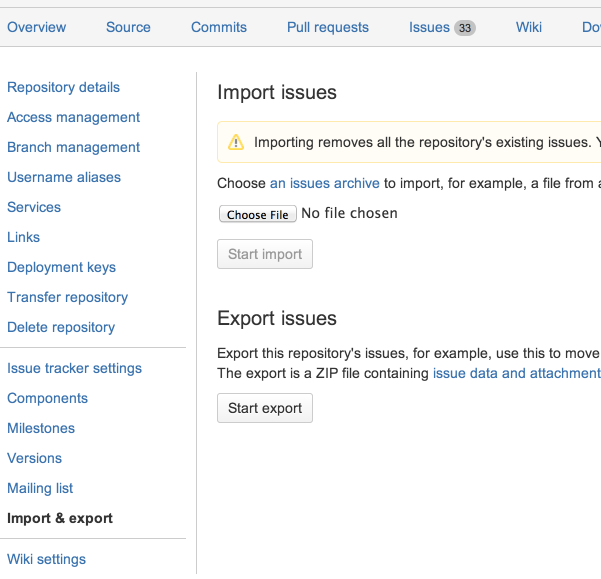
Although you can use bitbucket’s REST API, there’s an even simpler method which is just uploading the export.zip to their importer/exporter that can be found in the Settings area of the repo. Just append /admin/issues/import-export to your repo URL.

https://bitbucket.org/[user]/[repo]/admin/issues/import-export
Importing and Exporting Wiki
Each wiki in github and bitbucket is a git repository to which you’re able to push and pull like any other repo. They also respect the same permissions as the source repository. For github, the wiki repo URL looks like this – https://github.com/[user]/[repo].wiki.git – “.wiki” is added to the repo name. For bitbucket, the wiki repo URL looks like this – https://bitbucket.org/[user]/[repo].git/wiki – “wiki” is added at the end of URL. Check your repo’s Wiki tab for more information if required.
This way, moving the wikis from one repo to another between these two different services is just a matter of pushing and pulling changes – very simple.
That’s All!
This helped a lot! Thanks man!
Thanks Rishabh 🙂
Why doesn’t the script export all statuses? I’m not getting any of the Issues in opened status.
After three years this post still usefull .. Thanks man 🙂